Thursday, May 16, 2013

Test Tube Amigurumi

Since I've decided to get into putting up patterns, I suppose I'd better put up a disclaimer too. All my patterns are for your use to do whatever you so please with them. That means, make them for yourself, make them for gifts and if you feel like it, go ahead and sell what you make too...just not the pattern itself, cause like, it's free here and stuff.
Also, if you tell anyone about the patterns, please send them here or to my Ravelry designs and give me credit for them etc.

Otherwise just go for it!

Test Tube Amigurumi


This little amigurumi test tube could be stuffed and sealed, I suppose, but I like the idea of utility items, and I just know someone creative could sort out some clever way to use it. Perhaps as a case for pens, or needles or as a gift for a science minded kiddo stuffed with candy sticks, suckers or pixie sticks... Someone really really creative (not me) could probably design a neato rack to put three or more of them in for their mad scientist decorated bedroom.

Materials:
G hook
worsted weight acrylic in white and whatever color your "experiment" will be. 
(the pattern would work with any gauge or yarn and probably just give you diff. sized tubes.)

Stitches:
sc - Single Crochet
ss - slip stitch
rsc - reverse single crochet or "crab stitch"

Pattern:

With experiment color,
make 6sc in the magic ring (check youtube for tutorials. Best way to start ever!)
sc 2times in each sc for a total of 12 sc. 
sc in each sc around 
and around 
and around...
when you color change depends on how full your test tube wants to be. Keep in mind your total size and do a color change to white when you feel it's enough. I do the change at the beginning of a round. 
with white:
continue sc in each sc around until the tube is approx. five and a half inches long. 
Rsc around the rim for a rolled edge. 
ss together.
cut finish off and weave in ends. 


Variations:

So even a full test tube has that little clear reflection at the bottom, and if you're as ocd as I am, you might want to try a variation like the one in the center of pic. I just did the 6sc in the magic ring in white and then immediately switched to my green potion and then back to white for the top. I'm not sure which way I like them better. 
Also a long chain would make a nice hanger. I'd just finish my rsc row and then chain a long enough strap for the purpose and then attache it to the opposite side of the tube just below the rsc row. 

Enjoy! 


House Pride


Wednesday, May 15, 2013

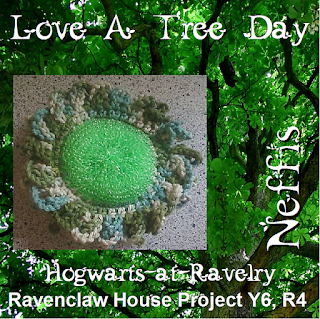
Flower Scrubbie Pattern

Apparently there's nothing new under the sun. I made this pattern up after my mum brought home a net scrubbie washcloth combo from a friend's house. Man, I thought, that's clever. You could make a really awesome flower out of one of those net scrubbies. :) So, I worked out the design below and then I went onto Ravelry to see if anyone else had done something similar....which of course they had.

But they're all a bit different, so here's my version. Reinventing the wheel so to speak. Most of the ones I've seen have solid petals. Mine is made of chain loops. I have no idea if that's good or bad. :)


Flower Scrubbie

materials:
plastic net scrubber
cotton
size G crochet hook

Stitches:
ss= slip stitch
ch= chain
sc= single crochet
hdc= half double crochet

round one:
poking the crochet hook through the scrubbie at the circumference and making sure to catch enough of the net to have a secure attachment, sc around the outside edge, evenly spacing your stitches and joining with a ss when you finish the circuit.

round two:
ch 2
*hdc in the next 4sc. hdc twice in the next sc* repeat *to * all the way around. ss together
(note: depending on how many sc you ended up with you may end in the middle of a repeat, so long as the round will lay somewhat flat and it joins up, you'll be fine) 

round three: 
the "petals" are made of chains and you'll have to turn the scrubbie this way and that to form them, but so long as they loop and attach at the right points the flower will look right. 
Chain 10 skip one hdc and ss into the next hdc
chain 10 and ss into the skipped hdc (from back to front)
*chain 10 skip ahead past the last chain and one hdc and ss in the next hdc
chain 10 ss back into the skipped hdc*
repeat from * to * all the way around. 
when you get to the first chain ss to last hdc finish off and weave in ends.